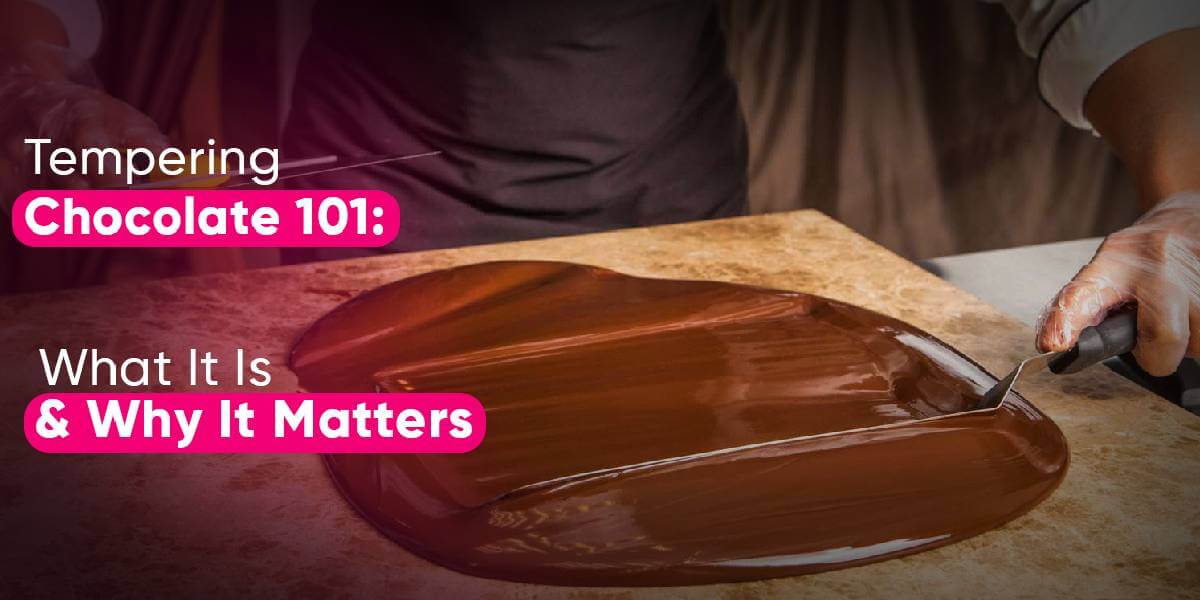
Tempering Chocolate 101: What It Is and Why It Matters
Want to level up your chocolatier skills? Tempering chocolate can seem like a mystery to many bakers, especially for those new to working with this versatile ingredient. However, it is crucial if you want to achieve the perfect, shiny finish on chocolate or give it that satisfying “snap” when broken.
This blog will guide you through everything you need to know about tempering chocolate, why it matters, and how to do it correctly. Let’s start!
What Does Tempering Chocolate Do?
Tempering is a process that stabilizes the cocoa butter crystals in chocolate, allowing it to set with a glossy finish and firm texture. When done correctly, tempered chocolate holds its shape, doesn’t melt too quickly, and delivers a smooth, even melt when eaten.
Tempering is crucial for professional chocolate makers and home bakers alike, especially if you’re crafting chocolate decorations, truffles, or even coating desserts. Without tempering, chocolate can become dull, crumbly, and lack the crisp snap associated with high-quality chocolate.
Why Tempering Chocolate Matters
Tempering offers multiple benefits for chocolate, particularly regarding texture and appearance. Here are the key advantages:
Glossy Sheen
Tempered chocolate looks beautiful and professional with its smooth, shiny appearance.
Snap
Chocolate that’s properly tempered breaks crisply, which is a desirable feature in many chocolate products.
Longer Shelf Life
Tempered chocolate has a longer shelf life as it resists blooming and retains its appearance.
Better Melting Properties
Tempered chocolate melts evenly in the mouth, allowing the true layers of flavor to develop.
More Stable
It is more resistant to heat, reducing the likelihood of melting on touch. Tempering Chocolate Temperature Guide

Understanding the correct temperature for tempering chocolate is crucial to success. Each chocolate has different temperature graphs for tempering so it’s always smart to refer to the instructions mentioned on the packaging. To give you some idea, here’s a quick guide to the temperatures for some dark, milk, and white chocolate:
Dark Chocolate
Heat to 113°F (45°C), cool to 85°F (29.5°C), and then reheat slightly to 89-90°F (31-32°C).
Milk Chocolate
Heat to 104°F (40°C), cool to 81°F (27°C), and then reheat to 86-88°F (30-31°C).
White Chocolate
Heat to 104°F (40°C), cool to 81°F (27°C), and reheat to 84-86°F (29-30°C).
Keeping a close eye on these temperatures ensures the cocoa butter crystallizes properly, resulting in chocolate that looks and tastes perfect.
What Happens If You Don’t Temper Chocolate?
Skipping tempering might sound appealing to avoid extra steps, but the results can be disappointing. Untempered chocolate exhibits the following issues:
Dull and Blotchy Appearance
Without tempering, the chocolate will lack that characteristic shine.
Slow Drying Time
Untempered chocolate takes longer to dry and won’t harden fully.
Grainy Texture
The texture of untempered chocolate is often crumbly or grainy, which is unpleasant when eaten.
No Snap
Untempered chocolate doesn’t have that clean break; it will bend or crumble instead.
Melts Quickly
It will melt faster in your hands or mouth, making it difficult to handle, especially in warm environments.
If the appearance and texture are less important to your recipe, such as when making a cake filling, you can skip tempering. However, for chocolate decorations, bars, or dipped treats, tempering is a must.
What Temp Does Chocolate Start to Melt?
Chocolate begins to melt at a relatively low temperature. Typically, solid chocolate starts melting at around 86°F (30°C), though this can vary slightly depending on the type of chocolate. Dark chocolate, for instance, may require slightly higher temperatures, while milk and white chocolate can melt at lower ones.
Melting chocolate is a crucial first step in the chocolate tempering process. If melted at too high a temperature, the chocolate will burn, losing its flavor and making it difficult to temper.
The Traditional Chocolate Tempering Process
The traditional method of tempering is a precise and controlled way to achieve beautifully tempered chocolate. It involves slowly heating and cooling the chocolate to ensure the cocoa butter crystals form in the correct structure.
Melting Your Chocolate
The first step is to melt the chocolate to the correct temperature. You can melt chocolate using one of two methods: a double boiler or a microwave.
Double Boiler Melting Method
Fill a saucepan with an inch of water and place a heatproof bowl on top, ensuring the bowl doesn’t touch the water. Heat the water gently, stirring the chocolate until it melts completely. Ensure the water doesn’t boil, as steam can ruin the chocolate.
Microwave Melting Method
If using a microwave, heat the chocolate in short 30-second bursts, stirring in between to ensure even melting. Be particularly cautious when melting white or milk chocolate, as they burn more easily.
Cooling the Chocolate
Once the chocolate is fully melted, the next step in the chocolate tempering process is to cool it to a precise temperature. This allows the formation of stable crystals. Stir the chocolate continuously while it cools to encourage the formation of these crystals.
Reheating the Chocolate
After cooling, you must gently reheat the chocolate to the correct working temperature. The goal here is to make the chocolate workable without disrupting the stable crystals you just formed.
Top 3 Chocolate Tempering Methods
There are several methods to temper chocolate, but three stand out as the most commonly used: seeding, table tempering, and direct heating. Let’s explore each one.
Seeding Method
The seeding method is one of the simplest and most widely used techniques for tempering chocolate. You melt most of your chocolate and then add small pieces of unmelted chocolate (the “seeds”) to the melted chocolate. This helps cool the mixture and encourages the formation of stable crystals.
- Melt your chocolate until it reaches the right temperature for melting.
- Add 30% of the total weight of melted chocolate in finely chopped pieces.
- Constantly stir until all the pieces melt and the chocolate cools to the desired temperature.
The seeding method is perfect for beginners and can be done without special equipment, making it ideal for home bakers.
Table Tempering Method
Table tempering is a more traditional and professional method that involves pouring melted chocolate onto a cool, smooth surface like marble or granite and working it with a spatula.
- Pour 80% of your melted chocolate onto a smooth surface.
- Using a spatula, spread and move the chocolate to cool it down evenly.
- Once the chocolate reaches the correct temperature, return it to the bowl and stir to combine with the remaining warm chocolate.
Though it requires more practice, table tempering is highly effective and yields excellent results in terms of texture and appearance.
Direct Heating Method
Direct heating involves slowly melting chocolate at a controlled temperature, typically in a chocolate warmer or a slow cooker. This method allows you to maintain a stable temperature without needing to reheat the chocolate multiple times.
While direct heating can be convenient, it’s easy to overheat the chocolate, so it requires careful attention.
Why is Chocolate Tempering Important?
Chocolate tempering is more than just a process; it’s a skill that ensures you get the best out of your chocolate. The cocoa butter within chocolate is temperamental, requiring precision to form the stable crystals that give chocolate its desirable qualities.
Without tempering, chocolate won’t just look less appealing; it will taste different, melt unevenly, and won’t have that clean, sharp break when snapped. Tempering is a must in professional chocolate work, and for home bakers, mastering tempering can take your chocolate-based treats to a whole new level.
Common Mistakes When Tempering Chocolate
Even experienced bakers can make mistakes when tempering chocolate. Here are a few common errors and how to avoid them:
Overheating the Chocolate
Chocolate burns easily. Keep a close watch on the temperature to prevent this.
Adding Water
Any moisture can ruin the texture of your chocolate, making it seize up.
Not Stirring Enough
Stirring helps create stable crystals, so don’t rush the process.
To Wrap Up
Tempering chocolate may seem like a complicated task, but once you understand the basic principles and processes, it becomes much more manageable. While tempering the chocolate temperature may be crucial to success, so be sure to use a good thermometer and follow the guidelines closely.
With the right technique and patience, you’ll be creating glossy, smooth, and professional-looking chocolates in no time. This method will elevate your desserts and sweets to perfection, so buy your baking chocolate from Cake Craft UAE today!